Afternoon DIY Kid Friendly Craft – Shaped Crayons
One of the many Valentine’s Day card ideas we’d kicked around was making crayons to give away to the kids classmates. This idea got bounced in favor of the 3D sucker cards and the Hershey Kisses, but once all those were wrapped up, I realized I still had some come up with a few small things for our kids, so I figured I’d give it a shot anyway.
I’d been reading about it online for a few years and the general consensus seemed to be to cut up leftover crayons and toss them into silicone molds then place them in the oven on low heat until they were melted. That seemed fine and dandy, but I didn’t have any silicon molds. I use standard plastic molds for my candy making and we’re perfectly content in life with ice cubes that are shaped like…well…ice.
Then I made an IKEA run with Hair as she was outfitting her new apartment and I spotted some silicon ice molds in their kitchen section. Heart shaped mold? Check. Flower shaped mold? Check. Reasonable Price? ($1) Check!
So I picked up two molds and brought them home.
Then I waited for a Saturday afternoon when the kids would be napping. After all, I was about to raid their crayon stash in preparation for a full on, cleaver-filled crayon massacre. (There are some things you just don’t want to let your kids see before they’re old enough to understand, you know?)
The first step was to strip the wrappers off the crayons.
Let me say this to Crayola.
“Enough with the glue!!”
Seriously? I can’t even tell you how much flipping work it is to peel the wrapper off a crayon these days. Apparently Crayola has started gluing them on to protect crayons from destructive children and knife wielding Pinterest users.
Thankfully, I discovered that if you took a paring knife and made a cut the length of the crayon, it all came off very easily and without much fuss.
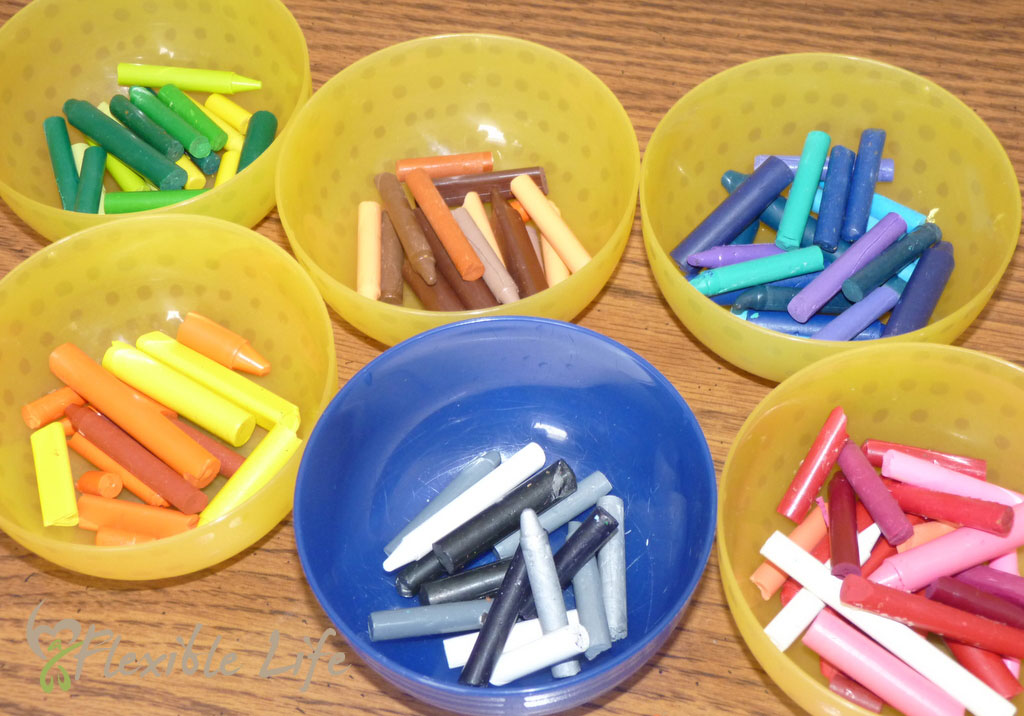
The next step was to pick out crayons in complimentary color groups. I’d seen plenty of mish-mash crayons…but I wanted mine to look…well…nice. And to be usable for more than just scribbling.
Once I had a decent number of crayons in each group, I grabbed a cutting board, my chef knife, (I don’t actually own a cleaver, ok…it just sounded more…dramatic) and go to town.
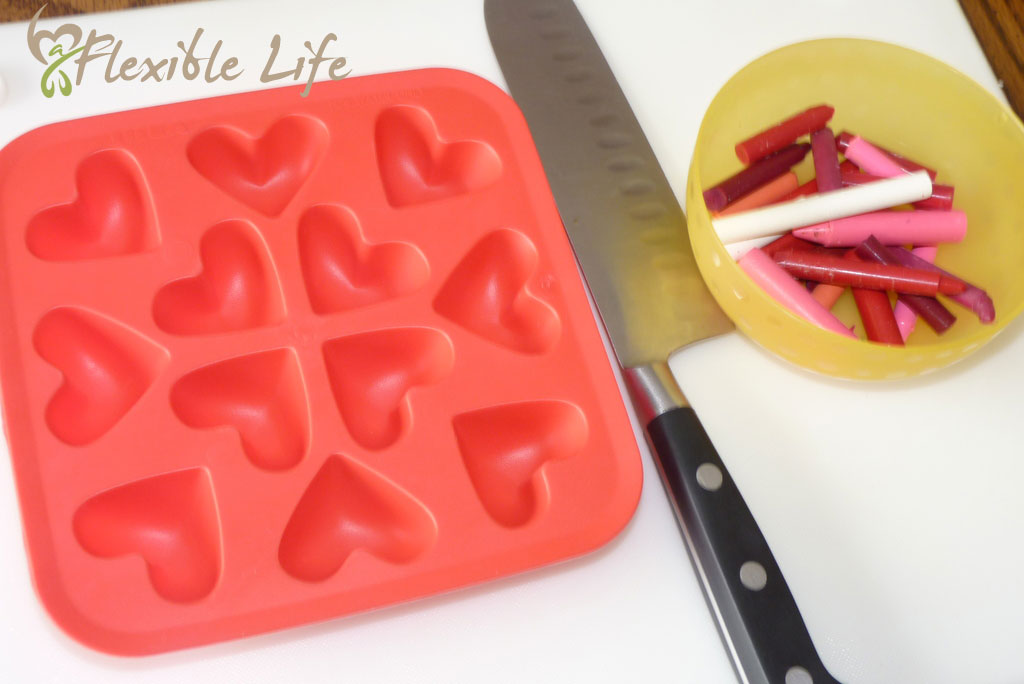
Pretty soon, I had bowls upon bowls of diced crayons ready to be packed into my silicone molds. So I started filling them up, trying to make sure I had a bit of variety in terms of where the colors were located within each crayon.
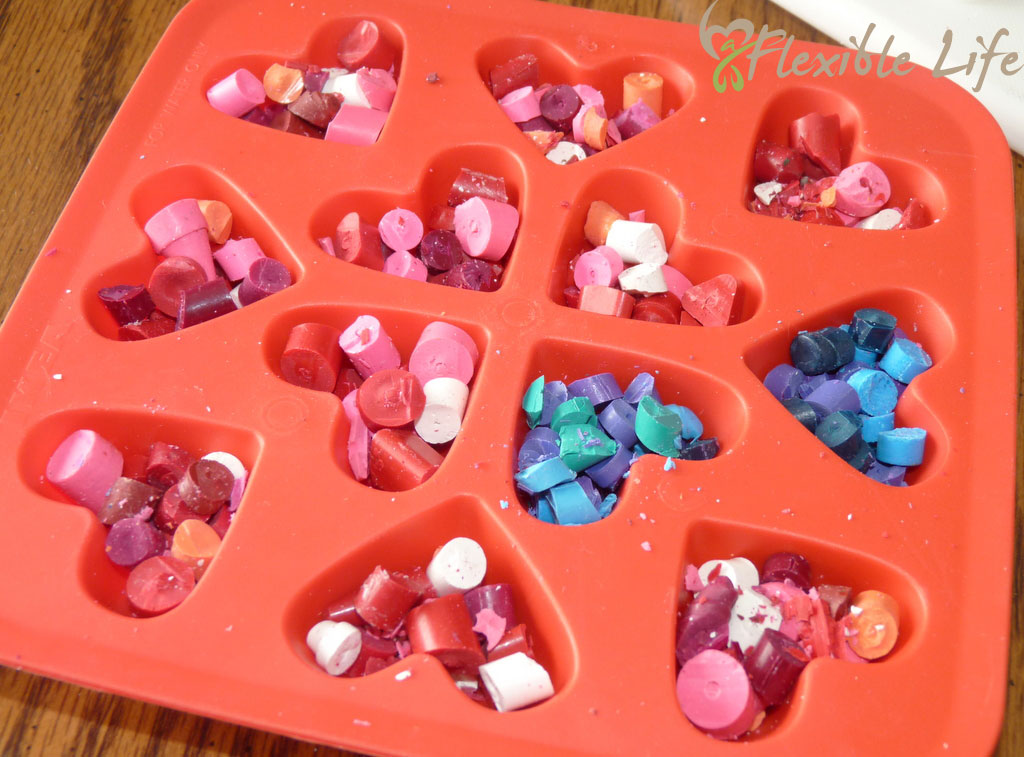
Now I’ll note that after I took this picture, I decided to go back and adjust my crayon distribution. Why? Well, Mr W came wandering through and reminded me of a little thing called “air.” Once my crayons started to melt, they were going to melt into that space currently filled by air and I was going to have very thin crayons.
Duh.
So I packed them to the point they were nearly overflowing.
Then I put them in the microwave.
Yes, you heard me. The microwave. Who needs to be all patient and wait for an oven? I have a microwave. Crayons are basically just wax…and candles melt in the microwave, right?
So I nuked them for 3 minutes on 80% power. Took them out, they looked exactly the same. I touched one and it smushed a bit. (Woo hoo! I knew it would work!) So I put them back in for 2 more minutes.
Now we were getting somewhere.
Another two minutes and my red crayons were all melted. My blue crayons on the other hand looked exactly like they did when I put them in. Apparently, blue crayons are the Superman of the crayon world and are absolutely impervious to microwaves. Who knew?
Of course as I was standing at the counter staring at the super hero of the crayon world, Mr W came wandering through again.
“What’s wrong?” he asked.
“These blue crayons won’t melt,” I replied. “It’s like they are impervious to microwaves!”
“It’s because of the dye color. Different colors will melt at different temperatures. You’ll probably need to nuke them longer.”
At this point, I raised my eyebrows and gave him that look. You know the one we give…when we’re trying to figure out if they are just making stuff up or if they actually have some scientific evidence to back them.
“Um, how do you know this?” I ask.
“Because that’s how it works for candles. Remember? I used to make my own candles.”
Oh yes, silly me. I forget I married McGuyver.
So I nuked and nuked and nuked some more and sure enough, McGuyver was right. The blue candles…I mean crayons melted just fine.
Of course at this point, I realized it had taken me fifteen minutes of nuking to get a single batch of crayons melted. This was sort of negating my whole point of using the microwave instead of the oven.
So I decided to do what any modern woman would do, I pit my household appliances against each other in a battle to the death. (Ok, maybe just in a battle for my affections.)
I cranked the oven on to a whopping 200 degrees and went about readying the flower container with a batch of green crayons. (Don’t ask me why I choose green for the flower mold, ok, I just did. Believe me, it was not the first stupid choice I was going to make that day.)
Once the mold was overflowing with crayons, I popped it into the oven, set the recently nuked batch of heart crayons further back on the counter to cool and headed downstairs to do some work.
Sounds like a good plan, right?
Yeah. It wasn’t.
About 40 minutes later, I did that thing moms do. The one where you crinkle your eyebrows and sniff a bit. Then you look to the side and sniff again. Then you think “Oh #*%&@” and you run upstairs? Yeah, that one.
Sure enough, smoke is shooting out of the steam vents on the oven. (What, your oven doesn’t have steam vents? That’s a whole other story for another blog post.) So I crack the door. At which point smoke BILLOWS out of the oven. Acrid, green smoke.
And then it hits me. I paid $1 for this “silicone” mold. In what world does an actual silicone pan cost $1? Even for IKEA, that’s just crazy talk.
Of course by now, enough smoke has billowed out that I can’t see my ceiling…but what I can see is my green “so-called-silicone” flower mold has melted through the oven rack and melted crayons is pouring through the holes and onto the bottom of the oven. Of course about this time the fire alarm starts screetching. (Good thing nap time was over.)
So I grab my trust OveGloves, shove a cookie sheet in underneath the rack and pull them both out together to carry over to the sink. Then I turn off the fire alarm, calm the large eyed children and prop the oven door open to let it vent while Mr W kindly walks around the house opening windows and doors.
Lesson learned. Don’t put “silicone” in the oven unless you KNOW without a doubt it’s oven proof. Stick to the time intensive microwaving instead. Life is never boring here, you know?
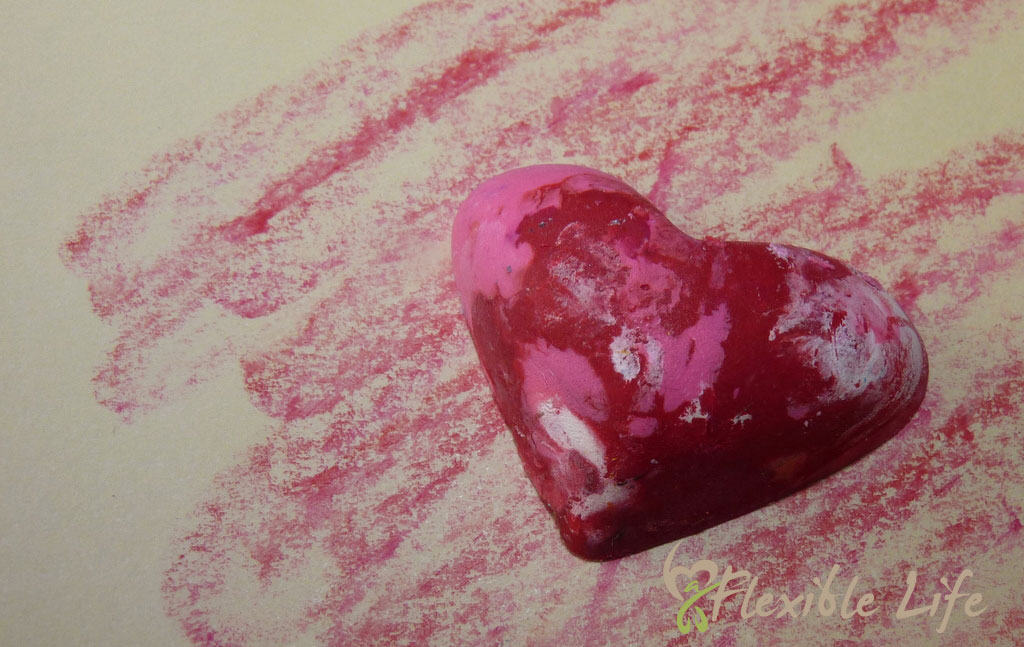
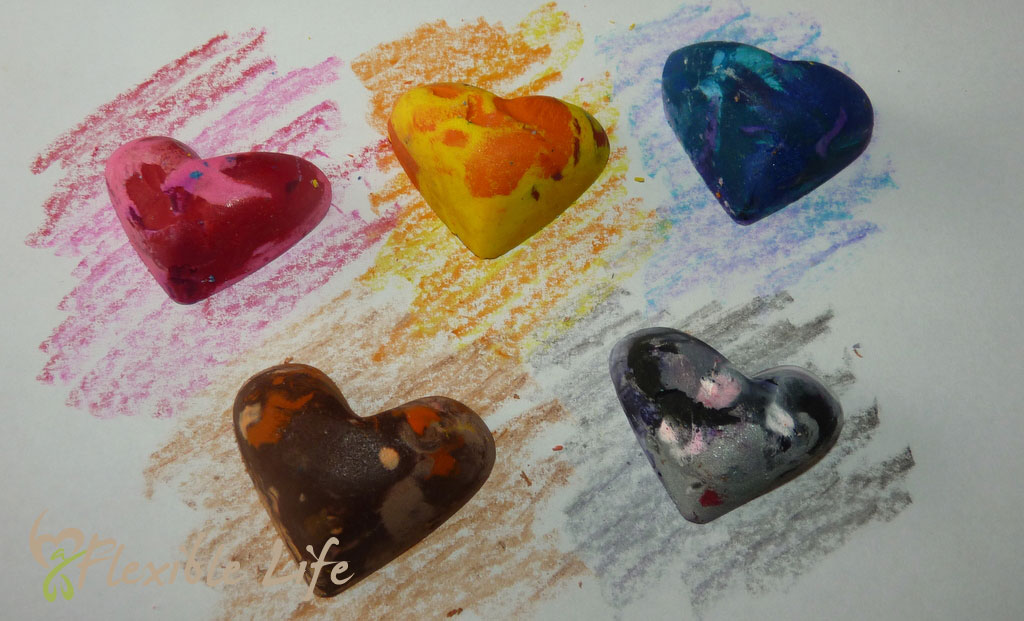
As for the crayons? Well…see above. I finished up the rest in the microwave, one batch at a time. Took me two days as they needed several hours to cool. But it’s not like it was labor intensive. While I wish we’d had some awesome green crayons for the mix, we did end up with red & pink, orange & yellow, blue, brown & tan, and black & silver.
They’re great for coloring. The natural shading looks awesome and the kids loved them.

If you have as many crayons laying around as we do, it’s a great way to upcycle them into something fun. I’m eying the Lego block molds on Amazon for somewhere down the line. Of course you’ll find a million other extremely cute silicone molds there as well.
Just promise me…you’ll check to be sure they’re oven safe before baking them. 🙂


I was wondering what type of crayon works best. I bought some at the Dollar Tree and am now I’m wondering if I should have stuck with crayola crayons. What crayons did you use?
Actually, your Dollar Tree crayons are your best bet. The Crayola ones use a thicker, less waxy wax and don’t tend to melt or blend as well. In my experience, the cheaper the crayon, the better it works for this purpose. (Also…the cheaper crayons are WAY easier to get the labels off of.)