
How to Make a Campfire Birthday Cake (With Bonus Fishing Cupcakes)

One of my favorite things about my kid’s birthdays is having a great excuse to go a little wild in the test kitchen coming up with a super cool birthday cake they’ll go nuts over. I’ve build cakes from donuts, crafted a space ship with rocket booster birthday candles, I’ve made Spiderman…it always comes down to what theme they are excited about in any given year.
Last month when we were coming up on Thing Two’s sixth birthday, I asked him what kind of cake he wanted for his family party and what kind of cupcakes he wanted for school. The response surprised me a bit…
“I want a fire cake for my party and fishing cupcakes for school.”
Um…ok.
I asked a few questions to clarify…did he want cupcakes that looked like fish (no), did he want a cake like a fire truck (no.) Finally, I got that it was about bonfires and fishing…two things “you can do outdoors that I really, really like.”
Cool…we’re on the same page.
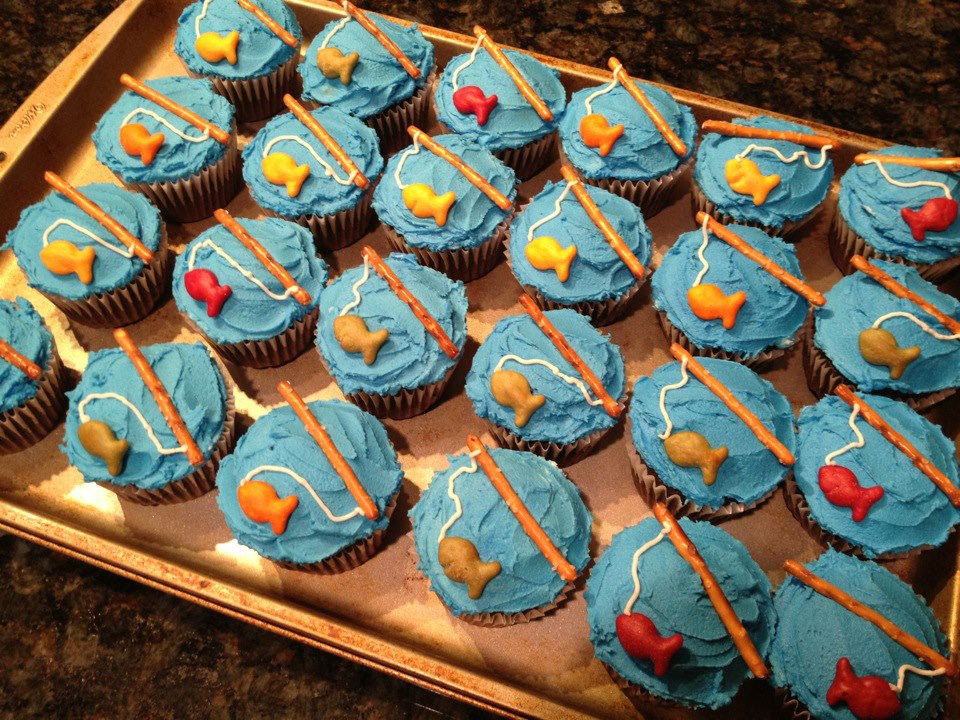
At some point on Pinterest, I’d run across a campfire cake made with pirouette logs and melted candy flames. That seemed doable. I’d also seen cute little cupcakes with goldfish crackers and pretzels for fishing poles. So it all seemed doable.
In fact, the hardest part of the cupcakes was getting enough blue food coloring into the mix to make a realistic fishing blue. Beyond that, it took about 10 minutes total to decorate the two dozen or so he took to school. Sweet! That’s my kind of cupcake!
Here’s how they turned out…
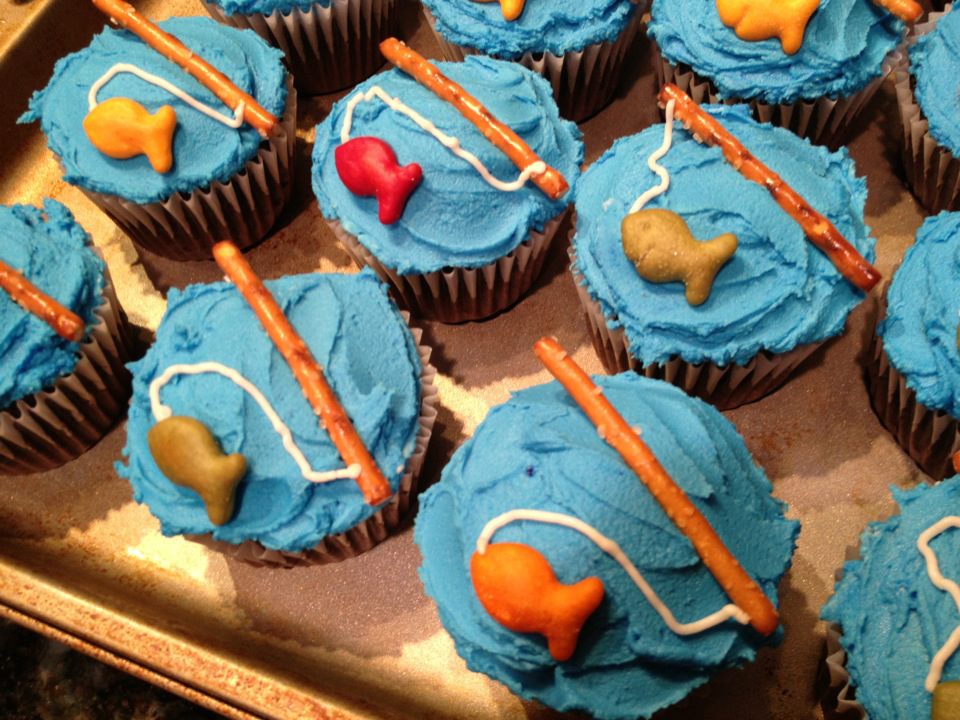
and a close-up…
The campfire cake on the other hand was a bit more work.
Mostly because I was out of high-ratio shortening and you simply cannot make to-die-for-delicious buttercream frosting without high-ratio shortening.
Soooooooooo….I made the 30 minute trek to a part of town we never visit to get high-ratio shortening from the cake baking shop. Before I left, Mr W asked me if I was going to call to see if they had it.
“It’s high ratio shortening,” I replied. “A cake shop not having it would be like Walmart not having milk!”
“Oh, never mind then,” he said.
And off I went.
To the cake shop. Where I walked back to the empty shelf where high-ratio shortening lives. It was empty.
“Where’s your high-ratio shortening?” I asked the lady behind the counter.
“We’re out,” she replied.
“What? How is that possible?”
“Someone came in last night right before closing and bought up everything we had, I’ll have more in tomorrow,” she said and then headed off to do something else.
You know those points where you ask yourself why the flip you just drove an hour round trip for a single ingredient to make the cake frosting taste better when the Giant Eagle down the road sells frosting in a can for .99 cents? Yeah, I hit that moment.
I kid you not, I almost cried in the parking lot. (I’m not even a crier, it had just been THAT kind of week.)
So I called Mr W to vent and being Mr W, he, at no point said “I TOLD you to call.” (I LOVE that man!)
Instead, he asked if there were any other cake decorating shops around. A quick check on my phone showed there was another one about twenty minutes further north (which was going to mean a 45 minute drive home by the time I was done), so I headed that way.
He did suggest I might want to call them first, and of course I agreed.
They had it in stock.
Crisis averted.
Now…for those of you who are not frosting people, you have no idea what this was all a big deal. I forgive you. I was once one of you. In fact, I was one of those people who scraped off the frosting to get to the cake. I find frosting from bakeries and cans to be pretty gross actually. Crisp (ew, frosting should NOT be crisp), oily and often gritty. Ick, it makes my teeth hurt.
The exception to this is the frosting on the cakes and cupcakes from Costco. THAT stuff is crack. Absolute crack. I can eat it with a spoon (and…MAY have…at some point…of, well…weakness.)
I have since learned that high ratio shortening is essential to making frosting that tastes like Costco’s and now it’s a must for our birthday cakes. (You can find the recipe I use for buttercream frosting on last year’s post of Thing One’s donut shaped cake.)
From there, it was a matter of stopping by the store to pick up some hard candies from the bulk bin and a tin of pirouette cookies.
I’ll skip all the early parts of the cake and cake assembly and go right to putting together the cool stuff.
First, I had Thing Two and Thing Three climb up on the counter to help me break up the candies. There are few things little boys love better than smashing things, so full permission to go wild on ziplock backs of candy with a meat tenderizer brought about some great smiles.

Once we had smashed them and sprinkled them on a pan lined with aluminum foil, we put them in the oven at about 350 degrees and kept an eye on them. It took about 8-10 minutes from them to get melty enough I could take a metal spatula and smooth them out. The result was pretty sweet looking…

Next up was the rocks. After all, a good campfire is always lined with rocks, right?
In my mind, rocks were easy. Just make up some marshmallow fondant, mix in some brown and grey food coloring and roll them into shapes. Right?
…right?
Wrong. Absolutely wrong.
What I got was mildly cream colored lumps. (And this was after putting COPIOUS amounts of high quality gel paste food coloring into the mix.) So I texted a friend who is a polymer clay artist and asked for some input. She suggested working with a paint brush.
By mixing the tiniest bit of water with the gel and dabbing at the rocks with a mostly dry brush, I was able to get them to START looking more rock like. Check out the unpainted cream colored blogs I had started with…

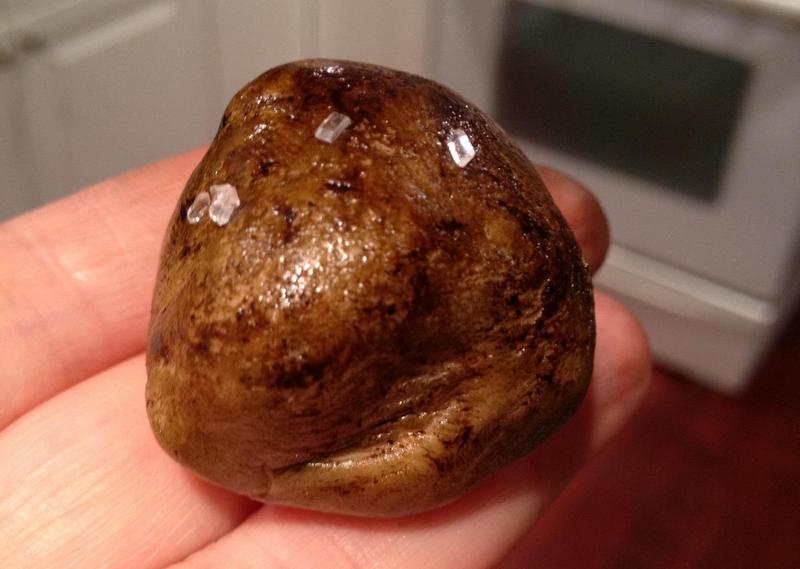
I found that by dry brushing them with brown food coloring first, I could make a strong enough foundation that painting them a bit later with some black food coloring mixed with water would give me VERY realistic looking rocks.

Aren’t they totally cute? And since I used marshmallow fondant, they tasted EXACTLY like thick, chewy marshmallows.
Granted, it took me about two hours to make the rocks, which was about 90 minutes more than I’d planned. That said, I painted them while we watched a few episodes of TV, so it really wasn’t that big a deal.
The next day, it was time to put the cake together. I made one batch of chocolate cake and one of yellow cake, then stacked them on top of each other and frosted them with grass green buttercream frosting.
Then I used the rocks to create a fire ring on top of the cake and filled in with “dirt” made of crushed Oreos.

Next I opened up the can of pirouettes and arranged them to look like logs in a campfire.

Then I took the melted pan of candy and broke it into shards that could be stuck into the cake to look like flames.

At this point, I realized the “grass” would look much better if it actually looked like grass, so I pulled out my can of frosting tips and went to town. It made a HUGE difference in how the cake looked and didn’t take but 15 minutes to do the entire cake.
I even stuck extra rocks and pirouettes in stacks along the side of the cake and filled in with more grass.

Overall, the cake turned out spectacular! I think it’s probably the coolest looking cake I’ve made so far. (Which was nice, because it certainly wasn’t the one that took the longest.)

Of course because of the melted candy shard flames, it REALLY looked like a campfire when we lit up the candles.

Of course the cake was big enough to feed about 30 people and we only ended up with about 12 at the party that night due to some last minute schedule issues. So, I took the rest of the cake in to the office staff at the elementary school the next day and let them devour it. 🙂
And there you have it: Campfire Cake 101.

Leave a Reply
Want to join the discussion?Feel free to contribute!