Insanely Fudgy Brownies from Scratch
 I’ve written before about my decade’s long search for the perfect chocolate chip cookie. As much as I love and adore a good brownie, I had given up on ever finding the perfect brownie recipe. Much like chocolate chip cookies, there’s simply too much variation in what people consider key traits, making it nearly impossible to believe other people when they claim to have found the winner.
Until now. I can now confidently state that I have discovered what just might be the best brownie recipe I’ve ever tasted in my life, and I have The Domestic Rebel to thank for it. Granted, I changed her recipe up just a little bit to reflect my tastes, but wow, does that woman know how to put together a fudgy delight!
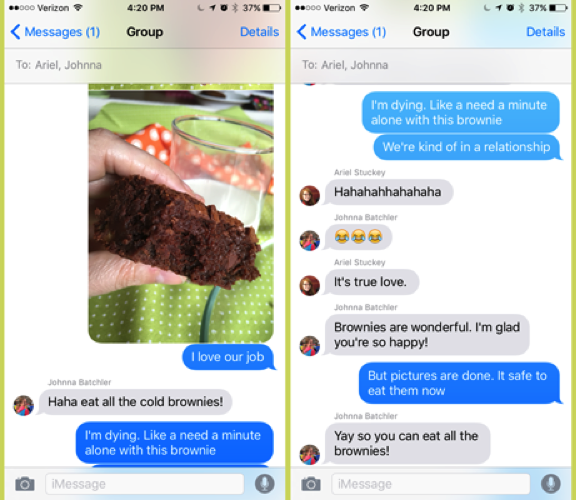
It all started when Johnna sent a text to Ariel and I while she was at her part-time job getting us all hyped up for brownies.
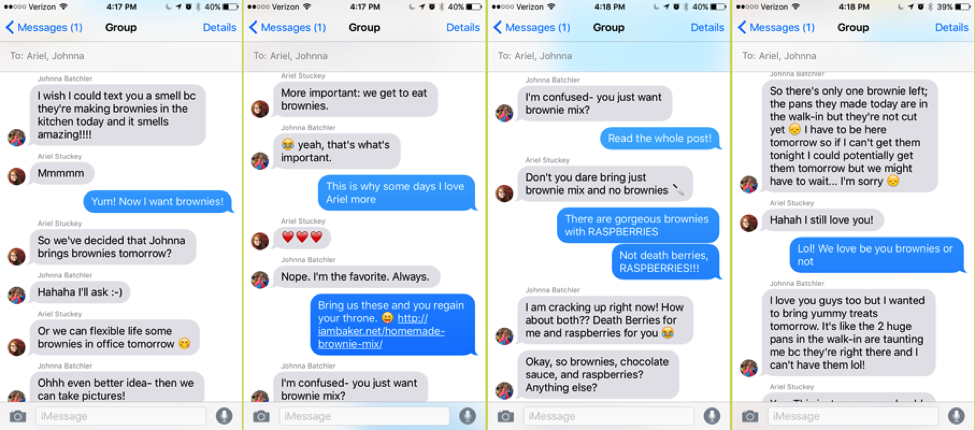
Now if you think about it, it wasn’t fair at all to throw those temptations out. Poor Ariel was in her last week of finals, and we’d been counting down the days for almost a year until graduation. Dangling the promise of brownies and then not delivering? Well, that’s just wrong. So, like the incredibly smart soon to college grad that she was, Ariel swooped in to save the day with a great idea.
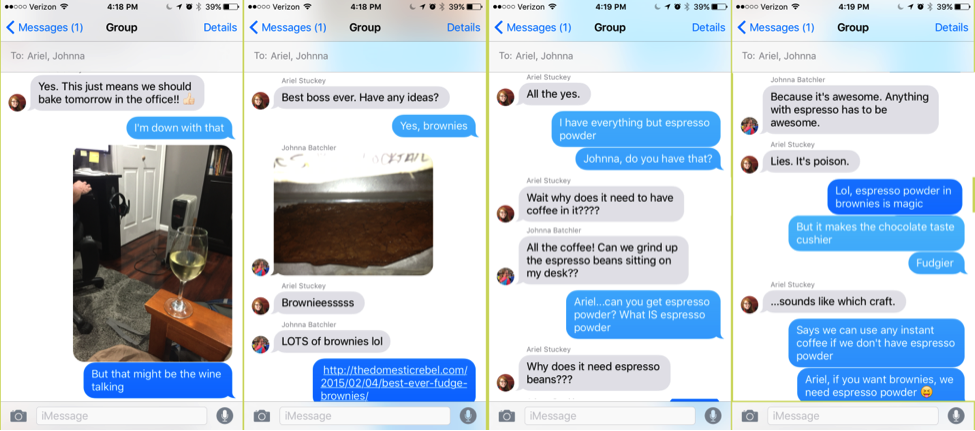
So, being the wonderful boss that I am, it was a no-brainer to see if I could find the best brownie recipe ever to get her through those last few days. Some Pinterest scanning during our conversation turned up the recipe over at The Domestic Rebel that features the Ginger Elizabeth bakery brownie recipe that I’d mentioned earlier. It came down to trying that one, or the Fat Witch Bakery brownie recipe that’s flying around the web, but having HAD Fat Witch Bakery brownies and thinking they were just a tad too greasy…I thought we’d give this new one a try.
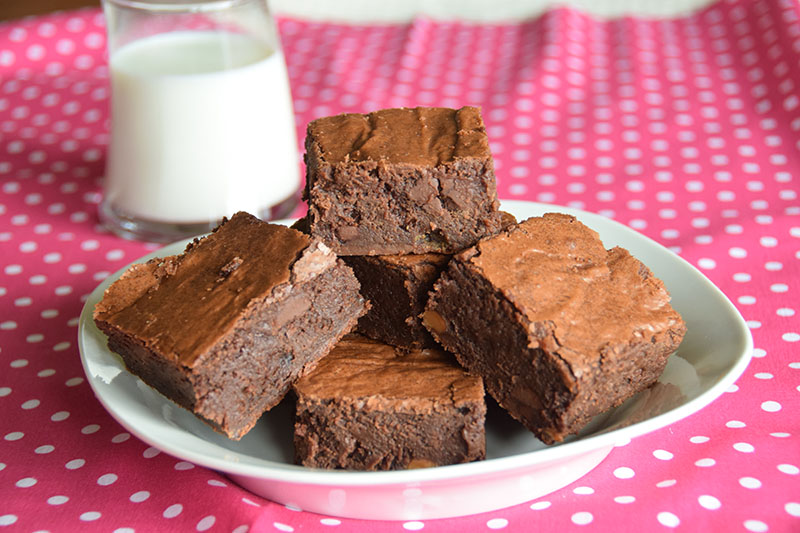
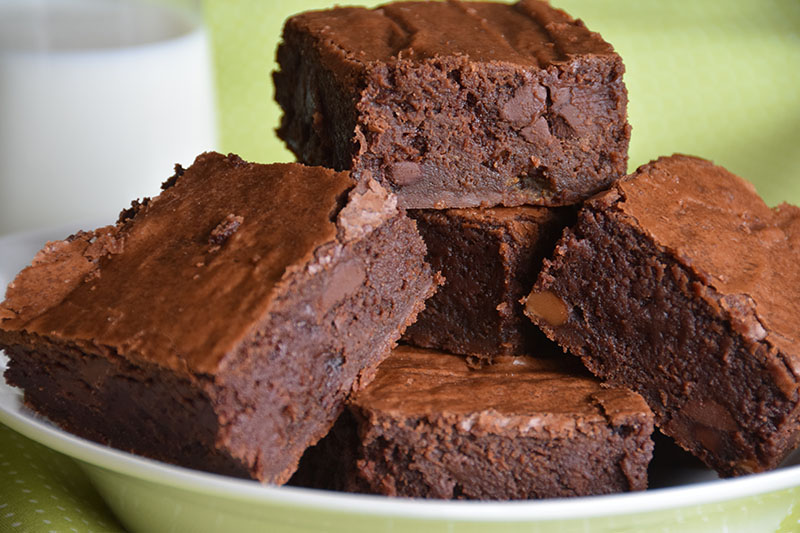 All I can say is that they are beyond fantastic. Then again, any recipe that includes two and a half sticks of butter, three cups of sugar and five eggs, all in a 9×13 inch pan has GOT to have some legs to it! We didn’t make any major shifts, just some changes to the types of chocolate and the addition of caramel pieces for a bit of added chew. I am tempted to remake them with some sea salt kick, or perhaps a layer of salted caramel swirled in, but I don’t know. Sometimes you just need to revel in the beauty of what something is.
When it came time to take the pictures for this blog post, revel is exactly what I did. I sat, and I ate, and I drank a glass of milk, and I looked out the window, and I thanked my lucky stars that my job lets me spend a Tuesday afternoon eating delicious brownies.
Seriously, these things were a ginormous pan of fudgy goodness that weighed a ton. They were insanely thick and about as fudgy as I’ve ever tasted. Give them a try; you will NOT be sorry. A few changes to note:
- I used salted butter instead of unsalted because I love it when my chocolate has a hint of salt to it.
- I also increased the vanilla a little bit because I was out of my really good Madagascar bourbon vanilla and I knew what I was working with wasn’t quite as strong.
- My eggs are free range, farm fresh from my backyard, so they are extremely rich and yolks that are almost orange. This tends to give my baked goods a great flavor. If you have access to duck eggs, I hear they work extremely well too.
- I use Zulka brand pure cane sugar from Walmart. It’s not as processed as the standard white variety and also changes the texture in a way that I like.
These didn’t take long to bake, though there was a lot of “holy crap that’s a lot of sugar” and “wow, that’s a lot of eggs” as we worked our way through the recipe. There was also a moment when I realized there was no baking powder or baking soda in them and I found myself wondering how exactly they were going to rise while baking.
Then I poured them into the 9×13″ pan and found myself realizing that it was probably a good thing they weren’t going to rise because if they did, I’d have brownie all over the bottom of my oven.
Once they were out and supposedly starting to cool, Ariel decided she couldn’t be patient any longer. In fact, she felt the need to dig into these almost as soon as she knew the molten batter wouldn’t destroy her mouth. Personally, I found them to be far tastier the next day after they’d had time to settle fully and cool. We stored them at room temperature in a Tupperware container, and they lasted about four days. They would have made it longer, but they were so rich that I ended up bagging them up and sending them off to all my friends. One brownie was an amazing experience, anything more left me starting to feel a bit ill.
These are now the standard issue brownie around these parts. Much like our beloved chocolate chip cookie recipe and my secret cinnamon roll recipe, there’s just no need to play around with other versions. We’d only be disappointed that we hadn’t made this one. That doesn’t mean we haven’t considered how we might alter them further. I’m thinking stuffing them with Rolo’s or Peppermint Patties might be a worthwhile experiement…
- 1 ¼ cups salted butter
- 3 c pure cane sugar
- 1 ½ T vanilla extract
- 5 large eggs
- 2 ¼ c King Arthur Flour
- 1 t instant coffee granules
- 8oz semisweet chocolate chips
- 4oz dark chocolate chips
- 4oz unsweetened bakers chocolate
- 12oz dark chocolate chips
- 6oz caramel baking pieces
- Preheat your oven to 350 degrees and grease a 9x13 inch baking pan.
- Place the butter, semi-sweet chips, finely chopped bakers chocolate and 4oz of the dark chocolate chips in either a double boiler or the microwave and melt, stirring until smooth. (I have a Wilton Chocolate Melting Pot that I use for this step that makes cleanup a breeze.)
- In your mixer, beat together the sugar, eggs, and vanilla until creamy using your paddle attachment. This took my KitchenAid about two minutes on a medium speed.
- Pour in the melted chocolate and butter mixture and let that mix in until the batter is smooth.
- Slowly add the flour, instant coffee and, if you wish, a teaspoon of kosher salt.
- Spread the mixture evenly into your greased pan. It will fill the pan up and look like it might overflow upon baking, but keep in mind this recipe doesn’t have any baking powder or baking soda in it, so it’s going to stay as dense as it looks.
- Bake for about 40 minutes, testing with a toothpick for moist, but not wet crumbs to come out.
- Remove from the oven and let it sit for awhile before cutting.


Leave a Reply
Want to join the discussion?Feel free to contribute!