Wonderful Wine Toting Beach Bags
 If there is one thing I’ve learned about online sewing patterns in my year as a sewer, it’s that you have to be ready and willing to take them with a grain of salt when things go south. In fact, in the dozens of projects I’ve made in the last year, I think only one of them didn’t require me to modify the pattern, or leave me thinking “why on EARTH would do they it THAT way?”
Johnna says I need to just accept it and move on because that’s how every pattern she’s ever downloaded has gone.
That’s fine and dandy for her, she’s been sewing for decades. I’m still new to this business.
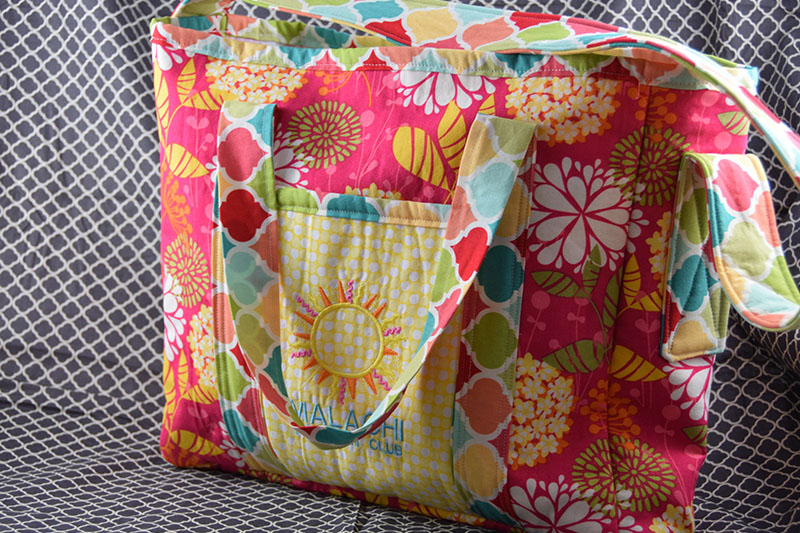
These beautiful bags looked to have a pretty great pattern behind them. They were based off of an insulated lunch hamper pattern offered up by Camelot Fabrics. The tote itself was pretty cute and the fabrics sold on their site are absolutely gorgeous.
I was looking for a project to make before an upcoming trip to Hilton Head with my two best friends and our spouses. I was looking for something practical, but also something fun that I could make as a gift for the three of us to use on the trip and to potentially use and spark memories after. A beach bag seemed like a great option.
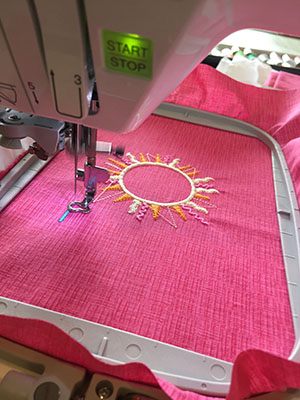 Customizing the pocket was really just a great excuse to use the embroidery feature on my new sewing machine. When my mother updated hers earlier this year, she brought me down the old one, a fantastic Babylock Esante that I can hook up to my computer and print embroidery files through. I had originally planned to put our names on them, but then I realized I wasn’t sure who would fall in love with each fabric pattern.
So instead, I decided to go with a cute little sun image I found on Etsy, though I removed the eyes and mouth using my embroidery software. I added the tagline “Malachi Vacation Club” as an inside joke for my friends. On the last trip Matt and I took with Karen and her husband, we came up with the Book of Malachi (pronounced Mah-Lah-Chi) and dubbed him the Italian prophet. He’s the one who writes all the really good stuff about wine and marriage and strong women.
The embroidery came out crazy cute and it was fascinating to watch the machine do all the embroidery work. Literally all I had to do was change the thread colors and hit “go” again.
Technology rocks.
Making the Bags
The bag pattern from Camelot Fabrics was designed to be used with their Spacetex insulating fabric. I knew I wasn’t going to care if my bag was insulated, so I simply bought enough of my primary fabric to line the inside with it in place of the insulating fabric. Ultimately, I also decided I wasn’t a fan of the way they had put their zippered top together, and since my bags were designed for the beach, rather than as insulated lunch hampers, I opted to trim off the flap and to sew binding around the top of my bags instead.
If you decide to use the pattern, I would suggest reading it through carefully before you get started. It would be great if they would add more photos to the mix to really help explain the spots where terminology and meaning get a bit fuzzy. I literally spent twenty minutes staring at the rip stop nylon pockets before figuring out how they wanted me to connect the top sections together.
It’s a solid pattern, just not well explained.
Either way, I learned a few things along the way.
First: It’s always a great idea to buy extra fabric. I basically doubled all the fabric amounts they called for with the exception of the rip stop nylon. Part of that was because I knew I would want to line the inside of my bags with it, but also because I thought I might want to have some matching fabric around in case I felt inspired after making them.
Second: When you are building out multiple items of the same pattern, cut and finish one project before cutting the rest of your fabric. I like to work assembly line style, but if you are trying a new pattern that you may need to modify, that adds a lot of time to the mix. Its way easier to do the first one and THEN move to assembly line style once you understand what changes you might need.
Here’s a quick walkthrough of how I used and modified the pattern. (Make sure you download or print the original pattern to work from.)
Step One: Cut all the lining pieces from your rip stop nylon fabric, except the lining top flap. You won’t need it in my modified design. I laid them out on the table and put Post-it notes on top of each pile stating the size and piece name. (Originally I only had the size, but since the pattern refers to pieces by name, I had to go back and add those.)
Follow the directions for making the lining, making sure you adhere to the ½” edge seam rule as you go.
The only modification I made at this stage was on the end compartments when they join with the center compartment. Rather than a single topstitch across the connection point, I made two, spaced about ¼” apart in height. It just made things feel more secure to me. I also lined up the bottoms of each section and sewed a two inch section together at each of the four connection seams so the liner couldn’t shift around as much in the bag.
Step Two: Cut outer fabric and lining from the same material, cutting two shell fronts instead of one shell front and one shell back. (You won’t need the flap since this is an open style bag.) Cut the interfacing out as well, also cutting two shell front panels instead of one front and one back. Iron the fusible interfacing to the wrong side of each matching piece of fabric, then add the lining piece to the back of the interfacing, right side facing out and use several pins to secure the three layers together.
Step Three: While I followed their directions on the shoulder strap, we decided to modify the handles after finishing up the first bag. The pattern calls for you to fold the handle fabric in half, stitch it, flip it inside out and iron it flat. The problem is, it takes a while and you can never really get that ironed seam back out. You end up with a line through your handles.
So instead, we laid the handle fabric flat, wrong side up, folded each long side in by about a quarter of an inch, folded the whole thing in half lengthwise before ironing that seam flat and top stitching with about a quarter inch seam allowance. This saved the time of flipping it inside out and removed the ugly iron seam. Of course when I laid it over the pocket, that meant the side seam didn’t really line up nicely to sew over top of, so we decided to stitch two seams on each side, making the handles even stronger.
Step Four: Assemble the bag pieces as directed in the original instructions.
Step Five: Instead of sewing the zipper in, slide the ripstop nylon lining into the bag and pin it evenly at the edges around the top. Sew this in place using about a quarter inch seam allowance. (This will make it easier to add the binding.) Take whatever fabric you used for either the handles or the pocket and make a few feet of binding out of it by following the same directions you did to put binding on the pocket. Pin the binding in place around the top of the bag, hiding the seams on the sides of the bag. Sew in place!
Ultimately, my mom ended up taking my fabric scraps home and making little 3”x3”x7” zippered box bags for us to match the beach bags. They’ll be perfect for holding keys, sunglasses or other little incidentals and they are cute as all get out. She used a standard zippered box bag pattern, but sewed different scraps together to get the fabric color burst in a different place on each one.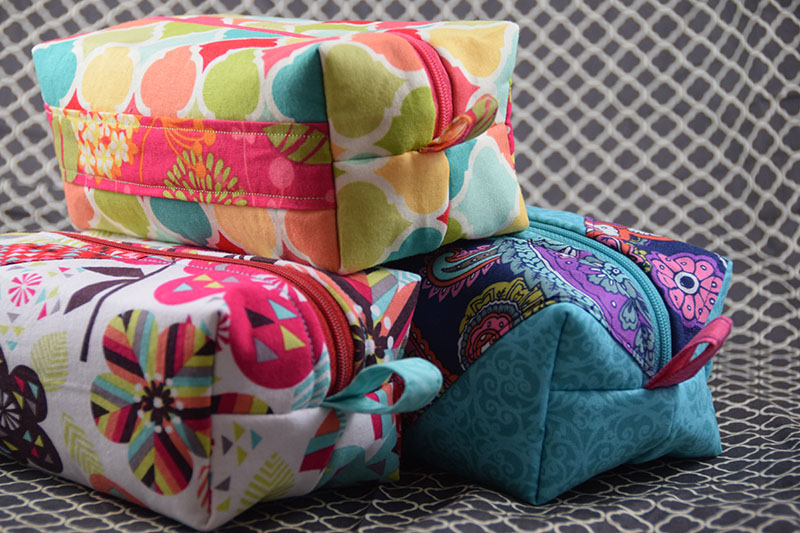
Aren’t they adorable?
Let me know if you’d love to see a fully done tutorial with step by step pictures. Ariel and Johnna both fell in love with these bags and are hoping I’ll make more, so we can always update the post to include the step by step.


Leave a Reply
Want to join the discussion?Feel free to contribute!